Whisper
Sunday, December 30, 2012
Reflections on 2012
Well, it's almost the end of the year. That's a great reason to reflect upon how I spent 2012. I'll have to say that 2012 will be a year that I will always remember. Several VERY special things happened in 2012 ... life events that I will never forget.
1 -- In the spring I learned that I was selected to be a Grosvenor Teacher Fellow and would travel on an Arctic Expedition with National Geographic and Lindblad Expeditions. I had a FABULOUS, educational time exploring Arctic Svalbard. Thanks to Google and Oracle who were also sponsors for this trip. There I saw seals, walrus, numerous birds, Beluga & Fin whales, and polar bears. I was also able to experience and learn about climate change first hand. I also traveled to Washington D.C. and Dallas with National Geographic. First, to D.C. to prepare for the expedition and then to Dallas to share about the expedition and the ocean curriculum we've been working on. This was a life changing experience; and one where I met some fabulous people from around the globe.
2 -- Our youngest daughter, Haylee, got her RN at the end of 2011 and got a great job as a nurse at a hospital at beginning of 2012. We're so proud of her.
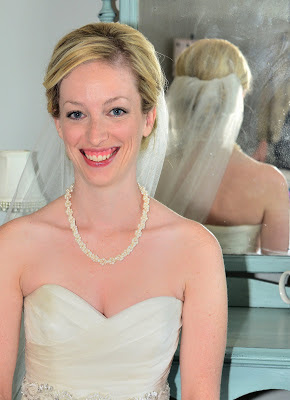
3 -- Our oldest daughter, Lindsey, moved back closer to home in July, and then we had her wedding to Tom on September 29. The wedding was in a local church but the reception was in an event tent her in our yard. It was a very special occassion that left us all with tons of memories.
In addition to these three events, there were many more wonderful times spent with family and friends. It was a wonderful year!!!
Friday, December 7, 2012
Impromptu Redo
When the partner in my booth space said that she was going to make a trip into the store tomorrow and she was willing to take my items too, I had to jump on that opportunity and redo a couple of items for her to take in. We live a 2 hour and 15 minute drive outside of the city where we have our booth space. THAT'S why this was such a great opportunity.
I didn't have much time so I managed to redo a chair and a footstool, plus create a few "smalls".
Here's the original chair... well, I had already removed the red vinyl seat at this point.
I really liked the lines of this chair. I decided to paint it with graphite chalk paint and wax over it with dark wax. I found a perfect fabric for the chair, just from the "stash" that I always have on hand. If your a sewer/crafter like me, I bet you have a "stash" of fabric too! Here's what I came up with.
Since I still had a little time left, I decided to redo an old footstool. This thing was a dirty mess. Here's what I started with:
The tapestry was hand-made and was probably quite pretty at one time. But when I took that off, below it was some old vinyl and LOTS of dirt and dust. Eventually I got down to the wood.
One more time, I looked into my fabric "stash" and found some solid off-white ticking and decided to cover the footstool with that. It was a nice heavy fabric.
Oh, it was pretty exciting as I was able to use some vintage lace that a friend had found at a garage sale and then let me have. I just love that lace!
While I was crafting I made a few other items.
Shared at:
AND.... just in case you'd like to see pictures of our booth. You can find some on our Face Book page here.
Friday, November 30, 2012
Pinterest Pillow Party
All evening I've been creating pillows similar to what I've seen pinned on Pinterest. It's been lots of fun. Here's a few pictures. I decided to display them in an old suitcase.
Here are pictures of each individual pillow that I made.
A while back I bought a set of vintage letter stamps at a garage sale. I thought the $20 price tag on those was pretty high but I was happy that I had them to make some of these pillows.
Well, there you have it.... the outcome of my private Pinterest Pillow Party!
Wednesday, November 28, 2012
A Fun Evening
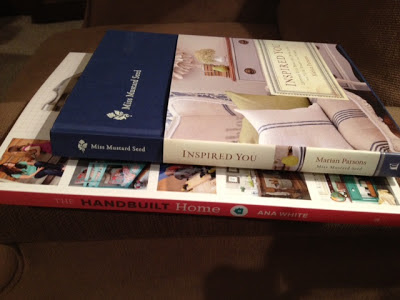
This evening has just flown by. I finished up some craft projects; I'm getting items ready to take into my booth this week end. And...... the books I ordered arrived!! WooHoo. Just take a look:
From a couple of my favorite bloggers! I've thumbed through both of them but will read them from cover-to-cover soon.
Who doesn't love Pinterest? I get so many ideas from there! Here are couple of Pinterest inspired projects I just finished tonight.
These pictures were taken in my basement, so you'll just have to ignore all the junk in the background. Maybe I can replace these pictures with better ones tomorrow. It's just too late tonight.
Monday, November 19, 2012
Milk Paint Projects
As I said in my last post,I bought some Miss Mustard Seed Milk Paint. In fact, I bought FOUR containers of Milk Paint: Luckett's Green, Tricycle, Ironstone, and Shutter Gray. So far I've painted two projects. Here's a glimpse:
This dresser is painted with Luckett's Green. I added the bonding agent to the first coat. Even with that it took 3 coats for me to feel like I had an adequate amount of coverage. After that, I used some Miss Mustard Seed's wax and I mixed some dark stain into it to. I had tried to order some of the antiquing wax but everybody seemed to be sold out. I think this mixture did the trick to get the antiqued effect.
I painted this piano bench with ironstone and then scraped. It didn't give quite the "chippy" effect that I was hoping for.
Overall, I'm happy with the way these first two milk paint projects turned out. The thing I've noticed about this paint is that it's unpredictable. It's more work than using the chalk paint that I'm used to. I have a lot more of the paint left so I guess that means I'll be experimenting some more with this stuff. Stay tuned.
These two pieces are for sale in my booth at Vintage Market in Kansas City, MO. Here's a picture of the pieces in the booth.
Friday, November 9, 2012
Milk Paint
Well, I ordered some of Miss Mustard Seed's Milk paint. I've had it for a few weeks now and have been rather scared to give it a try. Today I sat down and watched the first three videos on MMS web page to gain some courage. How can Milk Paint be scary??? Look at the cute packaging that it comes in.
The paint was easy to mix and easy to use. I was a little disappointed that it didn't produce the "chippy" look that I was hoping for. But it did crackle, and I liked that. Here are a couple of pictures of the wood on the bench that I painted. I still have to reupholster the top. So once that has been accomplished, I'll show the entire piece.
Sunday, October 14, 2012
Vintage Brooches - Wedding Bling
When my daughter and I were shopping for a ring bearer's pillow and flower girl basket, she found a set that she liked but it only came in pure white and she was using a slightly off white for her wedding. So she asked if I could make something similar. Well, of course I can, I replied! I was excited that the set she liked had a pearl pin on the front. I thought that perhaps I could use a few of the vintage brooches that I have to decorate the fronts instead of the fake pearl pins the store bought set featured.
I also decided to make a card box for her to sit on the gift table. I saw these types of card boxes on Etsy for more than $100. It took some time, but didn't cost anything close to that to assemble it myself.
It was fun to be able to use the vintage brooches for the wedding. I did have one person comment on how nice the brooches looked, she wondered where I had bought the items since they were so shimmery. It made total sense to her when I told her they were vintage brooches from my collection.
For anybody preparing for a wedding, my one piece of advice.... start early!!!
Linked at:
Subscribe to:
Comments (Atom)


